‏إظهار الرسائل ذات التسميات Windows XP. إظهار كافة الرسائل

الجمعة، 25 يناير 2013

Fix a Rotated Display


How to Fix a Rotated Display
Fix Rotated Display

Seeing your Windows display rotated and not knowing how to fix the rotation is frustrating, so I put this little post here with some steps on how to correct a rotated display on your Windows computer.


Problem:

Screen is rotated.


Applies to:

Windows (All versions)


How does this happen you ask?

You may make your screen rotated and you might not even know it - it all starts with Microsoft Windows hot keys and you may not even realize your are doing it.


The keys you maybe pressing are (CTRL + ALT + any arrow key)


CTRL + ALT + Up arrow = will set the display to 0 degrees.


CTRL + ALT + Left arrow = will set the display to 90 degrees.


CTRL + ALT + Right arrow = will set the display to 270 degrees.


CTRL + ALT + Down arrow  = will set the display to 180 degrees.


If the above is not working for you try 1 of 3 of these alternatives.


  1. If you "Right click" any where on your desktop - a pop up menu will appear and you may see this:
    Display Rotation Fix

  2. Right click any where on your desktop > then click on "Properties" > display properties box will open then click on "Settings" > then click on "Advanced" > you will see a tab that is related to your video card (i.e.. Intel or NVIDIA) this will open the graphics display card properties, which will have a setting for you to change the rotation to the screen.

  3. Click Start  > Click control panel > in here you should be able to locate your video card control panel, once you locate it, there will be a option in the "General Settings" that allows you to change rotation.


Hope this helps you resolve this issue!


الجمعة، 13 أبريل 2012

Fix a corrupted user profile Windows XP, Vista, 7.


Microsoft Windows
Windows

Windows XP, Vista, 7.


  • Click START Windows Start > Control Panel  > User Accounts

  • To Create a New User Account
    Click Create a new account in the Pick a task list box. 

  • Type the name that you want to use for the account, and then click Next. 

  • Select the desired account type, and then click Create Account. 


To Make Changes to an Account


  • Click Change an account in the Pick a task list box. 

  • Click the account that you want to change.

  • Select the item that you would like to change: 


  1. Click Change the name to change the name that appears on the Welcome screen for the account. 

  2. Click Change the picture to change the picture that is used to represent the user account. 

  3. You can use any image file on the computer for the user's picture. 

  4. Click Change the account type to change the account type to increase or decrease the user's rights on the computer. 

  5. Click Create/change the password to create or change the password for the user and create or change the password hint. 

  6. Click Delete the account to delete the user account from the computer. When you delete the account, you are given the option to save the user's files on the computer.


 Note: You can not delete the account for a user that is currently logged on to the computer.

Note: You can also create a new user account in Safe Mode.


Fix a corrupted user profile

After you create the profile, you can copy the files from the existing profile.


  • Log on as a user other than the new user you just created or the user that you want to copy files from.

  • Open the My Documents folder by clicking the
    Click START Windows Start > Click COMPUTER > Double-click the hard disk drive that Windows is installed on (it's usually your C: drive), double-click Users, double-click the folder with the name of your account, and then double-click My Documents.

  • Click the Tools menu, and then click Folder Options.

  • If you don't see the Tools menu, press Alt.

  • Click the View tab, and then click Show hidden files, folders, and drives.

  • Clear the Hide protected operating system files check box, click Yes to confirm, and then click OK.

  • Locate the C:\Users\Old_Username folder, where C is the drive that Windows is installed on, and Old_Username is the name of the profile you want to copy files from.

  • Select all of the files and folders in this folder, except the following files:
    Ntuser.dat  &  Ntuser.dat.log  & Ntuser.ini

  • Click the Edit menu, and then click Copy.

  • If you don't see the Edit menu, press Alt.

  • Locate the C:\Users\New_Username folder, where C is the drive that Windows is installed on, and New_Username is the name of the new user profile you created.

  • Click the Edit menu, and then click Paste.

  • If you don't see the Edit menu, press Alt.

  • Log off, and then log back on as the new user.

  • If you have e‑mail messages in an e‑mail program, you must import your e‑mail messages and addresses to the new user profile before you delete the old profile. If everything is working properly, you can delete the old profile.


If the steps above do not fix the problem, you should contact your customer support provider for assistance. To find additional information about customer support options that apply to this computer, click the Start Windows Start button , click Help and Support, and then click the More support options link at the bottom of the Help window.


الاثنين، 12 مارس 2012

CD/DVD/Blu-Ray Not Working

If your CD/DVD/Blu-Ray are not working then try these easy troubleshooting steps to fix the problem.


If the 
CD/DVD/Blu-Ray are not Writing to the DISC the try these:


  1.  Make sure you have the proper CD/DVD/BluRay record-able media type in the driver.
      If it is a CD-R/DVD-R you are trying to burn your media too make sure there is nothing currently on the CD-R/
    DVD-R
     or it will not burn, CD-R's/
    DVD-R's
     are ment for a 1 time only burn, if the burn did not complete or errored out during the burn then the CD-R/
    DVD-R
      is not good and you will need a another new CD-R/DVD-R  to burn too.

      If it is a CD-RW/DVD-RW then check to see if there are any files on the CD-RW/DVD-RW by
    Click START Windows Start > COMPUTER > Right Click on The CD/CDR/CDRW/DVD/BluRay and
    Click Explore > Check for any files.


    Windows Explore Menu
    Explore Menu


    If there are files Erase the CD-RW/DVD-RW - Then burn your media to the disc.


    Windows Erase Disc
    Erase Disc


    OR


    Windows Erase Disc
    Erase Disc


  2. If there are no files on the disc and you are still having troubles on writing to the disc try this:
      Click START Windows Start > Right Click COMPUTER > Click PROPERTIES > Click HARDWARE > Click DEVICE MANAGER.


Windows Device Manager
Device Manager


         Click the Plus next too: CD/DVD/Blu-Ray > Right Click on your CD/DVD/Blu-Ray Drive and


       Click on UNINSTALL > Once Finished Reboot your Computer.


       After Reboot your computer should be able to burn media to the proper discs.


 If you are still having issues visit this Microsoft Windows Website and Try their troubleshooting steps:


If your having issues with any other problems with your CD/DVD/BLURAY 


الخميس، 9 فبراير 2012

Windows XP SP3


Windows XP SP3 is already installed?


  • Windows XP Service Pack 3 (SP3) is an important update that includes previously released security, performance, and stability updates for Windows XP.


  • Click Start, right-click My Computer, and then click Properties.


    If Service Pack 3 is listed in the System section, SP3 is already installed on your computer and you don't need to follow the instructions below.


  1. Before you begin

  2. Installing SP3 using Windows Update (recommended)

  3. Manually installing SP3 using the Microsoft Download Center or a CD

  4. Uninstalling SP3

  5. Help stay safe and keep your computer up to date


Repair Network Connection


To attempt to automatically repair your network connection


  1. Click Start, and then click Control Panel.


  2. Under Pick a Category, click Network and Internet Connections.


  3. In the Network and Internet Connections window, under or pick a Control Panel icon, click Network Connections.


  4. Right-click your network connection, and then click Repair. If Repair is not available, make sure the network cable is connected and the network connection is enabled.


  5. Windows XP will attempt to repair your network connection. If it is unsuccessful, it will display a message describing the problem. After it is done, click Close.


Tip - Windows XP can fix most common configuration and software problems. However,Windows XP cannot fix problems with your modem or network. Windows XP also cannot fix hardware problems, such as a disconnected network cable or a faulty network card.

Windows XP Firewall


To verify that Windows Firewall is enabled


  1. Click Start, and then click Control Panel.


  2. In Control Panel, click Security Center.


    • If Windows Firewall shows On, you are protected.


    • If Windows Firewall shows OFF, it has been disabled.


Fore more information about Windows Firewall and how to use it visit the Microsoft Windows Firewall.

Connecting Wireless

Most computers have wireless networking built-in. If your computer doesn't have a wireless network adapter, you can install one. The type of adapter you install depends on your computer and your level of expertise.

To find out if you have a wireless network adapter or how to install a wireless network in your home please visit the Microsoft Wireless Center.

Computer wont start


How to fix a computer that won't start


A computer that won't boot is frustrating, but the problem is generally easy to fix. The steps you take to troubleshoot the issue depend on your symptoms. Click the account that best describes your issue to find a possible solution:


Disconnect unused network drives


To disconnect unused network drives


  1. Click Start, and then click My Computer.


  2. On the Tools menu, click Disconnect Network Drive.


  3. Select the network drives that you no longer need, and then click OK.


Defragment your computer


To defragment your computer


  1. Click Start, and then click My Computer.


  2. Right-click Local Disk, and then click Properties.


  3. Click the Tools tab, and then click Defragment Now.


  4. The Disk Defragmenter dialog box appears. Click your hard disk drive, and then click Defragment.


  5. Disk Defragmenter will work for at least several minutes, although it might take several hours. When prompted, click Close.


    Tip - If you have more than one hard disk drive, repeat this process for each hard disk drive listed, starting at step 4.


Disk Clean Up


To run the Disk Cleanup tool


  1. Click Start, and then click My Computer.


  2. Right-click Local Disk, and then click Properties.


  3. On the General tab, click the Disk Cleanup button. Disk Cleanup will spend a few minutes examining your disk.


  4. The Disk Cleanup dialog box will appear. Select each of the check boxes in theFiles to delete list, and then click OK.


  5. When prompted, click Yes. Disk Cleanup will spend several minutes removing these files, which will provide you with more space.


    Tip - If you have more than one hard disk drive, repeat this process for each hard disk drive listed in My Computer.


Windows XP


Microsoft Windows XP


Windows XP is an operating system produced by Microsoft for use on personal computers, including home and business desktops, laptops and media centers. First released to computer manufacturers on August 24, 2001, it is the second most popular version of Windows, based on installed user base. The name "XP" is short for "eXPerience."


Windows XP, the successor to Windows 2000 and Windows Me, was the first consumer-oriented operating system produced by Microsoft to be built on the Windows NT kernel. Windows XP was released worldwide for retail sale on October 25, 2001, and over 400 million copies were in use in January 2006. It was succeeded by Windows Vista in January 2007. Direct OEM and retail sales of Windows XP ceased on June 30, 2008. Microsoft continued to sell Windows XP through their System Builders (smaller OEMs who sell assembled computers) program until January 31, 2009.


The NT-based versions of Windows, which are programmed in C, C++, and assembly, are known for their improved stability and efficiency over the 9x versions of Microsoft Windows. Windows XP presented a significantly redesigned graphical user interface, a change Microsoft promoted as more user-friendly than previous versions of Windows. A new software management facility called Side-by-Side Assembly was introduced to ameliorate the "DLL hell" that plagues 9x versions of Windows. It is also the first version of Windows to use product activation to combat illegal copying.


During development, the project was codenamed "Whistler", after Whistler, British Columbia, as many Microsoft employees skied at the Whistler-Blackcomb ski resort.


According to web analytics data generated by W3Schools, from September 2003 to July 2011, Windows XP was the most widely used operating system for accessing the internet. As of January 2012, Windows XP market share is at 32.6% after having peaked at 76.1% in January 2007.


Microsoft Windows XP
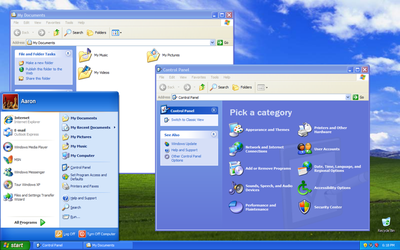
Screenshot of Windows XP


Windows XP
Part of the Microsoft Windows family
Developer
Microsoft Corporation
WebsiteWindows XP: Homepage
Releases
Release dateRTM: August 24, 2001

Retail: October 25, 2001; 10 years ago [info]
Current version5.1 (Build 2600: Service Pack 3) (April 21, 2008; 3 years ago) [info]
Source modelClosed source, Shared source[1]
LicenseProprietary commercial software
Kernel typeHybrid
Update methodWindows Update

Windows Server Update Services(WSUS)

System Center Configuration Manager(SCCM)
Platform supportIA-32, x86-64 and Itanium
Preceded byWindows Me and Windows 2000
Succeeded byWindows Vista
Support status
Mainstream supportEnded on April 14, 2009[2]
Extended supportExtended Support until April 8, 2014 for Windows XP with Service Pack 3 and Windows XP x64 Edition with Service Pack 2[2]
Downgrade supportAvailable until January 14, 2020[3]
Further reading


[ Source: Wikipedia | Copyright info: Used with permission from Microsoft. ]